Thursday, January 12, 2012

How to Make Chanuka Candles With Beeswax Sheets


Children and adults alike enjoy making their own Hanukkah candles out of beeswax honeycomb sheets.
Making candles is a wonderful Hanukkah craft. Hand rolled candles made from nicely textured honeycomb beeswax sheets is a fun way to create beautiful Hanukkah candles. The whole family will enjoy making sets of Hanukkah candles together before the holiday.

Hanukkah Candles

To celebrate Hanukkah, each person needs 44 candles. For this project, each person will need 8 honeycomb beeswax candle sheets.
Hanukkah candles must burn for at least one hour. These 6-inch-tall beeswax candles will burn longer than the requisite hour.
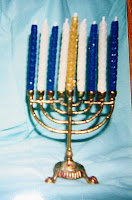
Popular colors for Hanukkah candles include natural golden honey, royal blue, and white. Beeswax candle making sheets come in a wide variety of colors to suit many tastes.

Beeswax Candle Sheets and Candle Wick

Beeswax sheets are most often sold as 8-inch by 16-inch rectangles. The template at the bottom of the page shows how to cut the beeswax sheets.
Each sheet will produce 8 Hanukkah candles, each is 6-inches tall, and one 2-inch-tall strip of beeswax. The leftover strip of wax is perfect for rolling a votive size candle, among other things.
Hand rolled beeswax candles burn best with thick cotton braided wick.

Hand Rolled Hanukkah Candle Making Supplies

To make 44 Hanukkah candles, gather:
  • 6 beeswax sheets
  • Thick cotton braid wick
  • Piece of cardboard 8" x 16"
  • Ruler
  • Pencil
  • Permanent marker
  • Sharp craft knife
  • Heat gun.

Template for Hand Rolled Beeswax Candle Making

Using a ruler and a pencil, draw the template (found at the bottom of this page) on a piece of cardboard. 
  • The top horizontal line is 2 inches from the top of the cardboard rectangle.
  • That leaves 6 inches in height for each Hanukkah candle.
  • Each piece of wax per candle is 2 inches wide.
  • There are 8 Hanukkah candles on the template.
When template is complete, go over pencil lines with a dark, permanent marker.

Making Beeswax Candles for Hanukkah
The following steps can be used to create these attractive handmade Hanukkah candles.
  1. Place beeswax honeycomb sheet on top of cardboard template.
  2. Holding beeswax sheet in place, carefully slice the sheet over the lines with a craft knife.
  3. Cut pieces of wick 6.5 inches in length.
  4. Lay wick on vertical side of cut honeycomb sheet.
  5. Briefly warm with a heat gun. Be very careful not to over-do this step; do not melt the wax.
  6. Starting at the wick, gently roll the wax around the wick so it becomes a candle.
This is a Jewish candle craft that is suitable and safe for children, though young children should have their wicks cut for them, and young children should not handle a heat gun.

Save the extra strip of 2" x 16" beeswax sheet to make a votive or for havdalah candle making.


Monday, January 2, 2012

Easy Container Candles

Choosing the right container to pour candles into is half the fun. Candle holders, mason jars, and ceramic pots add much to the personality, beauty and ambiance of candles. 


A container candle is simply a candle poured directly into the container. Once you have mastered the "tricks of the trade," a world of creative possibilities opens up. There is a breathtaking array of votive candle holders and candle cups in any shop that sells candles and candle holders.

The possibilities do not end with holders designed for candles. Chandlers enjoy a wide array of possibilities such as mason jars and ceramic flower pots. As long as a container is made of a non-flammable and heat resistant material, a candle can be poured and burned safely in it.

Wood will burn and plastic will melt, but pyrex, ceramic, and stone make wonderful containers for pouring candles into. Metal is not heat resistant. While metal is a good material for candlesticks, it is not the best for container candles.

This hand-painted votive container is
perfect for a poured container candle.
Supplies Needed


  • Wick clips, 
  • Wire core wick, 
  • Pencils (optional), 
  • Paraffin Wax, 
  • Candle scents, 
  • Wax dye discs, 
  • Containers, 
  • Double boiler, 
  • Kitchen thermometer, 
  • Kitchen scale, 
  • Measuring bowl, 
  • Wooden spoon, 
  • Wicking needle, 
  • Old newspapers and greaseproof paper. 
Wire core wicks are the easiest to use when making container candles, because the wire center enables the wick to stand up by itself after the hot wax has been poured. Choose either zinc core wicks or paper core wicks. Paper core wicks are not as sturdy as zinc core, but the flames they create are bigger and brighter.

Transparent containers should be heated up before pouring wax into them. This prevents a sloppy finish when the wax pulls away from the glass as it cools. If hot wax is poured into a cold mason jar, the finished candle will have an uneven, sloppy look. Hot wax poured into a warm container will cool with the glass, and leave an even finish. Before pouring hot wax, place pyrex containers or mason jars on a baking tray in an oven set at 180 degrees F. Let them warm for at least twenty minutes.

Cut pieces of wick and thread each one through a wick clip. Center the wick clip in the bottom of the container, and make sure the wick is strait. If using paper core wicks, cut them longer and wrap the top around a pencil. Rest the pencil on top of the container; this will hold the wick in place.

Place your measuring bowl on the kitchen scale and set the scale to zero. Measure a pound of paraffin wax.

Heat the water in the double boiler. Put a small piece of candle dye in the top of the double boiler and allow to melt.

Add the pound of paraffin wax and heat the mixture to 199 degrees F, stirring gently with a wooden spoon. Use a kitchen thermometer to monitor the temperature of the wax. Add about an ounce of liquid scent to the pound of melted paraffin wax. Continue to stir gently with spoon.

Carefully pour the hot wax into each container, just as tall as you want the candle. Tap the sides of the container gently to release air bubbles. Center the wicks, and leave the candles to cool for an hour.
Candles poured into natural clay holders.

When you return, you will notice a well has formed in the middle of the candle. This happens because wax shrinks as it cools. Take your wicking needle or strong piece of wire (an old piece of coat hanger works nicely) and poke a hole in the middle of the well. Reheat your wax to 199 degrees F. Carefully pour the wax into the well. Fill the candle without letting hot wax seep between the candle and the inside of the glass container. Wax seepage will show and make the side of the container candle marred and ugly. This is not an issue, however, if using opaque containers such as ceramic flower pots.

Wait another hour. When you return, you may or may not want to repeat the last two steps again. When the candles are cool, you are free to decorate the outside of the container with artist's acrylic paints, or hot glue and ribbons, buttons, or mosaic tiles. You may also leave them as is for a simple and refined finish.